May
I’ve decided to dedicate the next month to practicing anatomy every day. By doing so, my sculpts should improve overall.
At this point, I’m already a week into it and I can see major improvement in my understanding of facial forms. Instead of just sculpting 1 piece of anatomy and throwing the sculpt into a folder to never be revisited, I’ve started to turn it into an actual face.
The first day was the eye. Below is a screenshot of how that turned out. Not too bad, but obviously there’s room for improvement. Learned some really useful techniques along the way though.
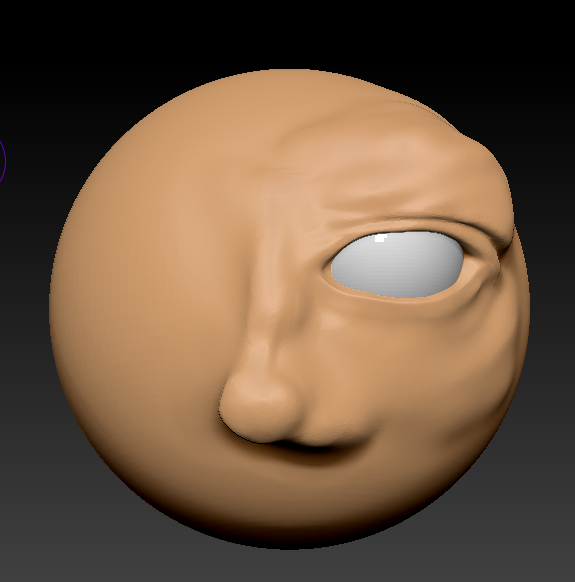
For instance, I’ve found it much easier to form eyelids by first establishing some basic form around the eye socket. Nothing too precise, but enough mass to have an idea of where the eyebrow is, the bridge of the nose and cheekbone.
Then, take the DamStandard brush and draw out the shape of an eye. Similar to how you would do it in 2D. Once that’s done, inflate the mass in the middle of that shape. It’ll definitely look weird at first, but there’s a method to the madness.
Also, here’s a huge lesson I learned to easily establish forms without fighting ZBrush too much. In this block out phase, sculptis pro mode tends to be a game-changer. I was originally taught to use dynamesh to block out, but I now disagree with that approach. Dynamesh has it’s purpose, but when you just need to push and pull mass around to establish form, sculptis will get you there.
Anyway, after you’ve inflated the eye lids, append a sphere, scale it and position it where the eyeball would go. There’s plenty of nuance to this, but it’s difficult to explain in text and I simply didn’t capture pics to elaborate. I’ll do that on a later post when I share the progress I’m currently at.
Now, deflate the lids until they wrap around the eyeball as eyelids do. Use pinch to define the edges and clay tubes to add mass in areas where you’d find fat deposits.
I know that tiny bit of text isn’t enough to establish a good workflow for yourself, but I’m mostly just blogging all this out to solidify the techniques in my mind. If there’s anyone out there actually reading this and would like a demonstration, I can make a video.
Ok. Now that eyeball was only the first sculpt. Day 1. Where things have developed from here is actually pretty shocking to me. Day 3 and forward will all be separate posts, but I want to combine day 1 and 2 here.
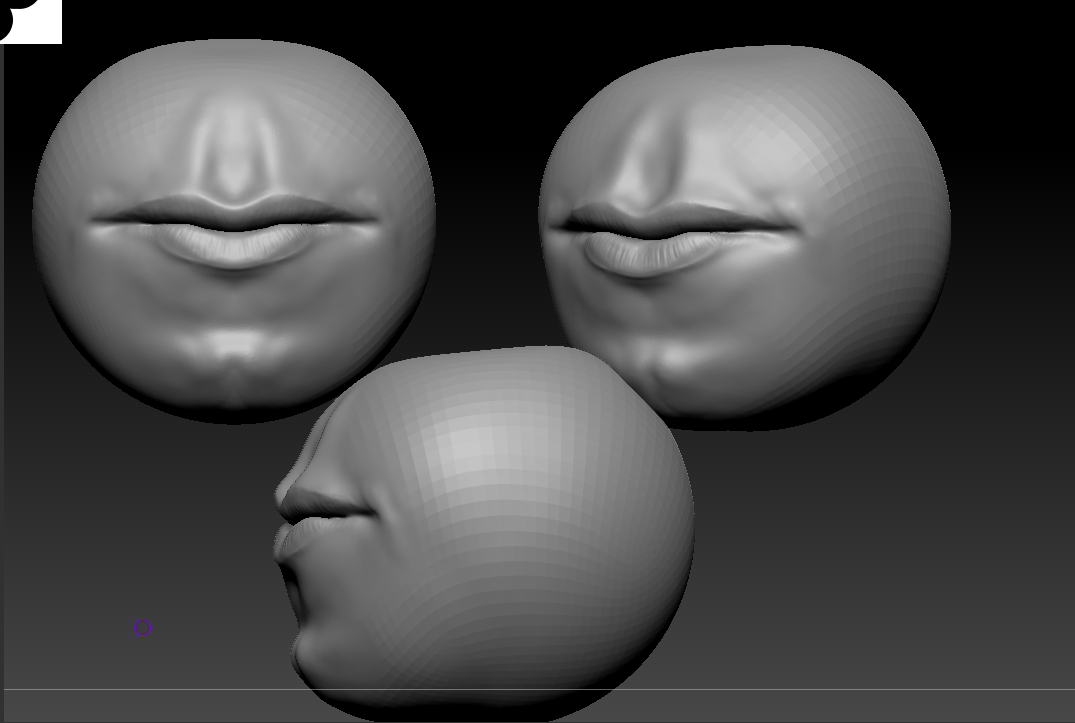
My 2nd day, I focused on lips. Here’s the reference I used
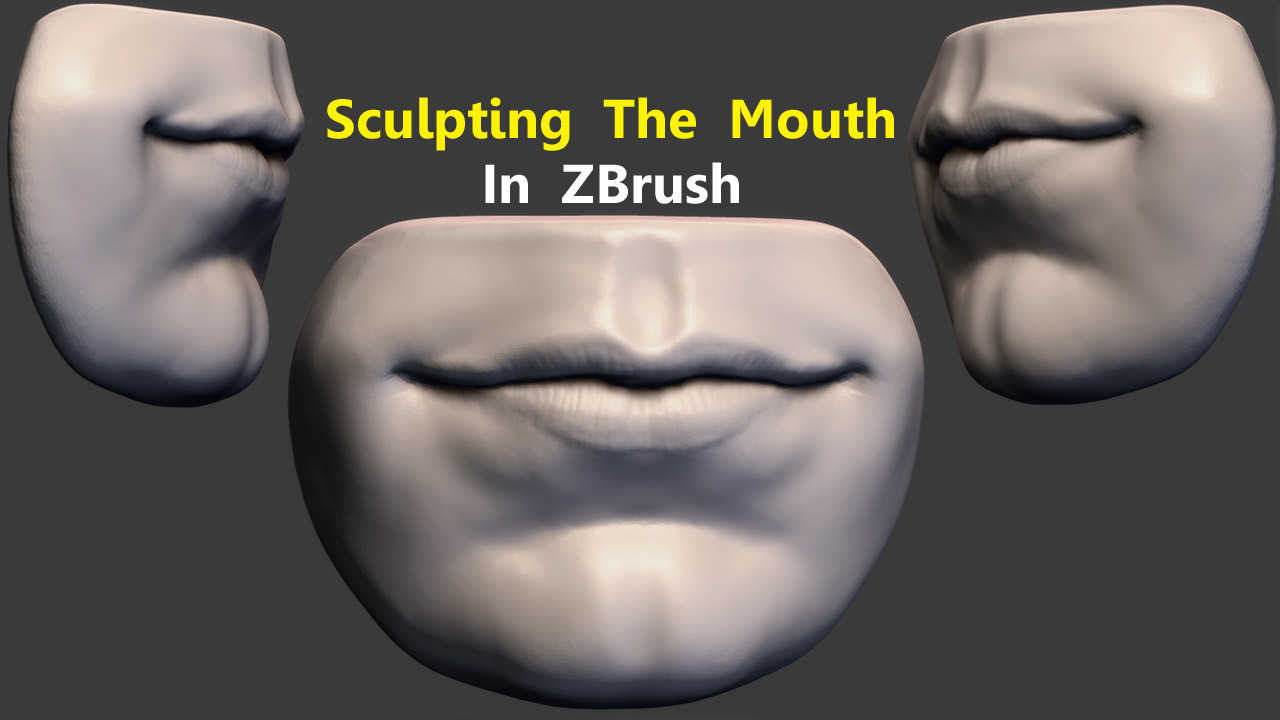
This led to a pretty decent sculpt and it actually wasn’t the only reference I used, I just can’t find the other one right now. The other reference showed the muscles under the skin so it made it easier to visualize where to put the mass.
I’ve taken to TikTok, Instagram, Twitter and YouTube to post clips of the process. If you’d like to check those out, here are the links:
@mayjormayham Sculpting someone a day at a time by only sculpting 1 feature every morning. Who do you think this will be? 'Dystopia' by Neutrin05 is under a Creative Commons license (CC BY 3.0) Music promoted by BreakingCopyright: http://bit.ly/Neutrin05-Dystopia #artist #creative #art #3d #3dart ♬ 1901 – Instrumental – Phoenix
Making quick vids of my daily anatomy sculpts. Figure I might as well make them into someone recognizable while I'm at it#zbrush #3dart pic.twitter.com/cMyehJl1vm
— MayjorMayham (@mayjormayham) May 13, 2024
More to come. If you enjoy this post, please leave a comment below. Although I do like to use this blog to record my progress, I tend to keep a majority of the info in written form. If there’s an audience that actually wants to read this stuff regularly, I can post more often.
Pingback: Sculpting A Nose For Practice » Khaos Kollective